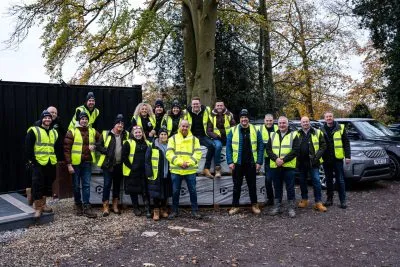
Order Samples
composite prime logo

fitting guide

We recommend using treated 4×2 timber joists and building in a gradual gradient of at least 1 in 100 (1%) that runs away from any adjoining buildings. Composite deck boards should run lengthways down this gradient to help water naturally disperse.

IMPORTANT: Spacing between the joists should be no greater than 300mm between each joist. Place the first piece of composite decking on the timber frame with the decking running perpendicular to the joists. The first piece of composite deck may be secured with end clips. Do not screw or nail through HD Deck, use 1 clip and screw on every joist. Take a screw, place in the hole located in the clip and screw into the wooden joist. Do not tighten at this stage. Make sure the composite deck boards do not over hang the joist at the edge by more than 20mm and a 20mm expansion gap should be left between the wall or other fixed objects surrounding the composite deck.

Take the next piece of composite deck and securely push into the clips. Now nip the screw to secure the clip against the board. Do not over tighten.Now repeat steps 3 and 4 to cover the composite deck, using 1 clip and screw on every joist. Liberally apply a high quality grab adhesive to the end caps to secure for extra adhesion. Wipe away any excess from the edge of the cap.IMPORTANT: Do not allow composite deck boards to meet at the ends. When installing in temperatures of:

  • 15°C or above allow a 5mm gap for expansion.
  • Between 10-15°C allow a 6mm gap for expansion.
  •  Between 5-10°C allow a 7mm gap for expansion.
  • Do not install in temperatures below 5°C.
  • Joins should only occur over double joists with a clip securing each end.

[/vc_column_text][/vc_column_inner][vc_column_inner width=”1/2″][vc_single_image image=”137″ img_size=”full”][vc_column_text css=”.vc_custom_1544117272812{padding-right: 18px !important;padding-left: 18px !important;}”]If using, take the angle edging strip and place on the edge of the composite deck. Allow a 5mm gap between the end of the composite deck board and vertical edge of the strip. Use a drill to first make a pilot hole through the strip and deck. Screw strip into the joist through the first pilot hole. Drill more pilot holes as required and affix strip with screws.[/vc_column_text][/vc_column_inner][/vc_row_inner][/vc_tta_section][vc_tta_section title=”HD DECK 150″ tab_id=”hd-deck-150″][vc_row_inner][vc_column_inner width=”1/3″][vc_single_image image=”161″ img_size=”full”][vc_column_text css=”.vc_custom_1544117955353{padding-right: 18px !important;padding-left: 18px !important;}”]We recommend using treated 4×2 timber joists and building in a gradual gradient of at least 1 in 100 (1%) that runs away from any adjoining buildings. Composite deck boards should run lengthways down this gradient to help water naturally disperse.

IMPORTANT: Spacing between the joists should be no greater than 300mm between each joist.[/vc_column_text][/vc_column_inner][vc_column_inner width=”1/3″][vc_single_image image=”162″ img_size=”full”][vc_column_text css=”.vc_custom_1544117962472{padding-right: 18px !important;padding-left: 18px !important;}”]Place the first piece of composite decking on the timber frame with the decking running perpendicular to the joists. The first piece of deck may be secured with end clips. Do not screw or nail through HD Deck, use 1 clip and screw on every joist.[/vc_column_text][/vc_column_inner][vc_column_inner width=”1/3″][vc_single_image image=”163″ img_size=”full”][vc_column_text css=”.vc_custom_1544117968663{padding-right: 18px !important;padding-left: 18px !important;}”]Take a screw, place in the hole located in the clip and screw into the wooden joist. Do not tighten at this stage. Make sure the boards do not over hang the joist at the edge by more than 20mm and a 20mm expansion gap should be left between the wall or other fixed objects surrounding the composite deck.[/vc_column_text][/vc_column_inner][/vc_row_inner][vc_row_inner css=”.vc_custom_1544117468093{margin-top: 50px !important;}”][vc_column_inner width=”1/3″][vc_single_image image=”164″ img_size=”full”][vc_column_text css=”.vc_custom_1544117974864{padding-right: 18px !important;padding-left: 18px !important;}”]Take the next piece of deck and securely push into the clips. Now nip the screw to secure the clip against the board. Do not over tighten.[/vc_column_text][/vc_column_inner][vc_column_inner width=”1/3″][vc_single_image image=”165″ img_size=”full”][vc_column_text css=”.vc_custom_1544117979226{padding-right: 18px !important;padding-left: 18px !important;}”]Now repeat steps 3 and 4 to cover the deck, using 1 clip and screw on every joist.[/vc_column_text][/vc_column_inner][vc_column_inner width=”1/3″][vc_single_image image=”158″ img_size=”full”][vc_column_text css=”.vc_custom_1544117985498{padding-right: 18px !important;padding-left: 18px !important;}”]Liberally apply a high quality grab adhesive to the end caps to secure for extra adhesion. Wipe away any excess from the edge of the cap.[/vc_column_text][/vc_column_inner][/vc_row_inner][vc_row_inner css=”.vc_custom_1544117471598{margin-top: 50px !important;}”][vc_column_inner width=”1/2″][vc_single_image image=”159″ img_size=”full”][vc_column_text css=”.vc_custom_1544117992394{padding-right: 18px !important;padding-left: 18px !important;}”]IMPORTANT: Do not allow composite deck boards to meet at the ends. When installing in temperatures of:

  • 15°C or above allow a 5mm gap for expansion.
  • Between 10-15°C allow a 6mm gap for expansion.
  •  Between 5-10°C allow a 7mm gap for expansion.
  • Do not install in temperatures below 5°C.
  • Joins should only occur over double joists with a clip securing each end.

[/vc_column_text][/vc_column_inner][vc_column_inner width=”1/2″][vc_single_image image=”160″ img_size=”full”][vc_column_text css=”.vc_custom_1544117998457{padding-right: 18px !important;padding-left: 18px !important;}”]Drill pilot holes with counterbore through the fascia at 200mm – 300mm intervals. According to ambient temperature allow a 5 – 7mm gap between end of composite deck board and the fascia. Screw fascia to the joist. Always screw fascia to the joist at a 90° degree angle.[/vc_column_text][/vc_column_inner][/vc_row_inner][/vc_tta_section][vc_tta_section title=”HD DECK Dual” tab_id=”hd-deck-dual”][vc_row_inner][vc_column_inner width=”1/3″][vc_single_image image=”171″ img_size=”full”][vc_column_text css=”.vc_custom_1544118161318{padding-right: 18px !important;padding-left: 18px !important;}”]We recommend using treated 4×2 timber joists and building in a gradual gradient of at least 1 in 100 (1%) that runs away from any adjoining buildings. Composite deck boards should run lengthways down this gradient to help water naturally disperse.

IMPORTANT: Spacing between the joists should be no greater than 300mm between each joist.[/vc_column_text][/vc_column_inner][vc_column_inner width=”1/3″][vc_single_image image=”172″ img_size=”full”][vc_column_text css=”.vc_custom_1544118202831{padding-right: 18px !important;padding-left: 18px !important;}”]Place the first piece of composite decking on the timber frame with the decking running perpendicular to the joists. The first piece of deck may be secured with end clips.

Do not screw or nail through HD Deck Dual, use 1 clip and screw on every joist.[/vc_column_text][/vc_column_inner][vc_column_inner width=”1/3″][vc_single_image image=”173″ img_size=”full”][vc_column_text css=”.vc_custom_1544118175421{padding-right: 18px !important;padding-left: 18px !important;}”]Take a screw, place in the hole located in the clip and screw into the wooden joist. Do not tighten at this stage. Make sure the composite deck boards do not over hang the joist at the edge by more than 20mm and a 20mm expansion gap should be left between the wall or other fixed objects surrounding the composite deck.[/vc_column_text][/vc_column_inner][/vc_row_inner][vc_row_inner css=”.vc_custom_1544117468093{margin-top: 50px !important;}”][vc_column_inner width=”1/3″][vc_single_image image=”174″ img_size=”full”][vc_column_text css=”.vc_custom_1544118182820{padding-right: 18px !important;padding-left: 18px !important;}”]Take the next piece of deck and securely push into the clips. Now nip the screw to secure the clip against the board. Do not over tighten.[/vc_column_text][/vc_column_inner][vc_column_inner width=”1/3″][vc_single_image image=”167″ img_size=”full”][vc_column_text css=”.vc_custom_1544118209416{padding-right: 18px !important;padding-left: 18px !important;}”]Now repeat steps 3 and 4 to cover the composite deck, using 1 clip and screw on every joist.[/vc_column_text][/vc_column_inner][vc_column_inner width=”1/3″][vc_single_image image=”168″ img_size=”full”][vc_column_text css=”.vc_custom_1544118216740{padding-right: 18px !important;padding-left: 18px !important;}”]Liberally apply a high quality grab adhesive to the end caps to secure for extra adhesion. Wipe away any excess from the edge of the cap.[/vc_column_text][/vc_column_inner][/vc_row_inner][vc_row_inner css=”.vc_custom_1544117471598{margin-top: 50px !important;}”][vc_column_inner width=”1/2″][vc_single_image image=”169″ img_size=”full”][vc_column_text css=”.vc_custom_1544118223214{padding-right: 18px !important;padding-left: 18px !important;}”]IMPORTANT: Do not allow composite deck boards to meet at the ends. When installing in temperatures of:

  • 15°C or above allow a 5mm gap for expansion.
  • Between 10-15°C allow a 6mm gap for expansion.
  •  Between 5-10°C allow a 7mm gap for expansion.
  • Do not install in temperatures below 5°C.
  • Joins should only occur over double joists with a clip securing each end.

[/vc_column_text][/vc_column_inner][vc_column_inner width=”1/2″][vc_single_image image=”170″ img_size=”full”][vc_column_text css=”.vc_custom_1544118228577{padding-right: 18px !important;padding-left: 18px !important;}”]Drill pilot holes with counterbore through the fascia at 200mm – 300mm intervals. According to ambient temperature allow a 5 – 7mm gap between end of deck board and the fascia. Screw fascia to the joist. Always screw fascia to the joist at a 90° degree angle.[/vc_column_text][/vc_column_inner][/vc_row_inner][/vc_tta_section][vc_tta_section title=”Video” tab_id=”1550150172851-af102461-d94f”][vc_video link=”https://www.youtube.com/watch?v=idCCjFVET4Y” align=”center”][/vc_tta_section][/vc_tta_tabs][/vc_column][/vc_row][vc_row][vc_column][vc_text_separator title=”Composite Prime Care & Maintenance Guidlines” css=”.vc_custom_1544120100649{margin-top: 65px !important;margin-bottom: 65px !important;}”][/vc_column][vc_column width=”1/3″][vc_column_text]Care Guidelines
Even though our composite decking is a low maintenance product, periodic cleaning is recommended, even if your composite deck board appears clean, it is important to prevent the build-up of pollen and debris that can cause mould growth. It is recommended that furniture placed on the composite deck board is fitted with rubber or felt feet to prevent unnecessary scrapes.

Weathering
During the first 6 – 12 months the colour pigments will stabilise, during this time fading may occur before weathering naturally.

Cleaning Guidelines
Domestic pressure washers may be used with caution in conjunction with the spray nozzle. Pressure washers can be used to remove stains, ground-in dirt and chalk. Keep a distance of at least 1ft between the nozzle and the composite deck to prevent damage to the deck.[/vc_column_text][/vc_column][vc_column width=”1/3″][vc_column_text]If you’re unsure of cleaning/removing stains from your composite deck baords, it is always recommended that you test a small area in an inconspicuous place to determine if the cleaning product will cause any unwanted discolouration.

Dirt, debris and watermarks
Clean the composite decking to remove dirt or debris by using soap, hot water and a strong bristle. Rinse thoroughly.

Mould and Mildew
Use an organic patio cleaner such as Algon or a sodium percarbonate oxygen activated bleach. Ensure all detergent is washed off after use.

Chalk Markings
Scrubbing the area with hot soapy water may
dislodge some of the chalk. Rinse thoroughly.

Ice and Snow
Calcium chloride or rock salt, available in many home centres, will melt ice on decking. Rinse thoroughly when practical.[/vc_column_text][/vc_column][vc_column width=”1/3″][vc_column_text]Rust Stains, Ground-in Dirt and Grime

Use a cleaning product containing oxalic or phosphoric acid base to lighten or remove the rust or dirt. Product may need to sit on stain 10-15 minutes. Rinse thoroughly.

Oil and Grease Stains
Scrub in a household-degreasing agent as soon as the stain occurs. Rinse thoroughly with warm water.

Berries and Wine Stains
Mix an eco-friendly sodium percarbonate bleach in hot water label. Scrub the stain lightly and immediately rinse the area thoroughly.
Note: Using too much bleach may cause lightening of the deck colour. The stain may not disappear entirely.[/vc_column_text][/vc_column][/vc_row]

error: Content is protected!